Authorize an agent
If you'd like someone to view, discuss, or act on your behalf regarding your property assessment information, you'll need to authorize them. Just complete the "Authorize an Agent" form on Assessment Search. This authorization needs to be done each year for each property roll number.
If you have questions or need help, call us at 403-268-2888.

How to add or remove authorization
- Your current year’s assessment notice’s access code. If you have lost or can’t find it, request a new access code.
- Your agent’s myID username to proceed with the authorization process.
Step 1
Sign in
Step 1
Sign in
Sign in to Assessment Search using the Secure Access option.
If you don't have a login, create an account.
Step 2
Select property
Step 2
Select property
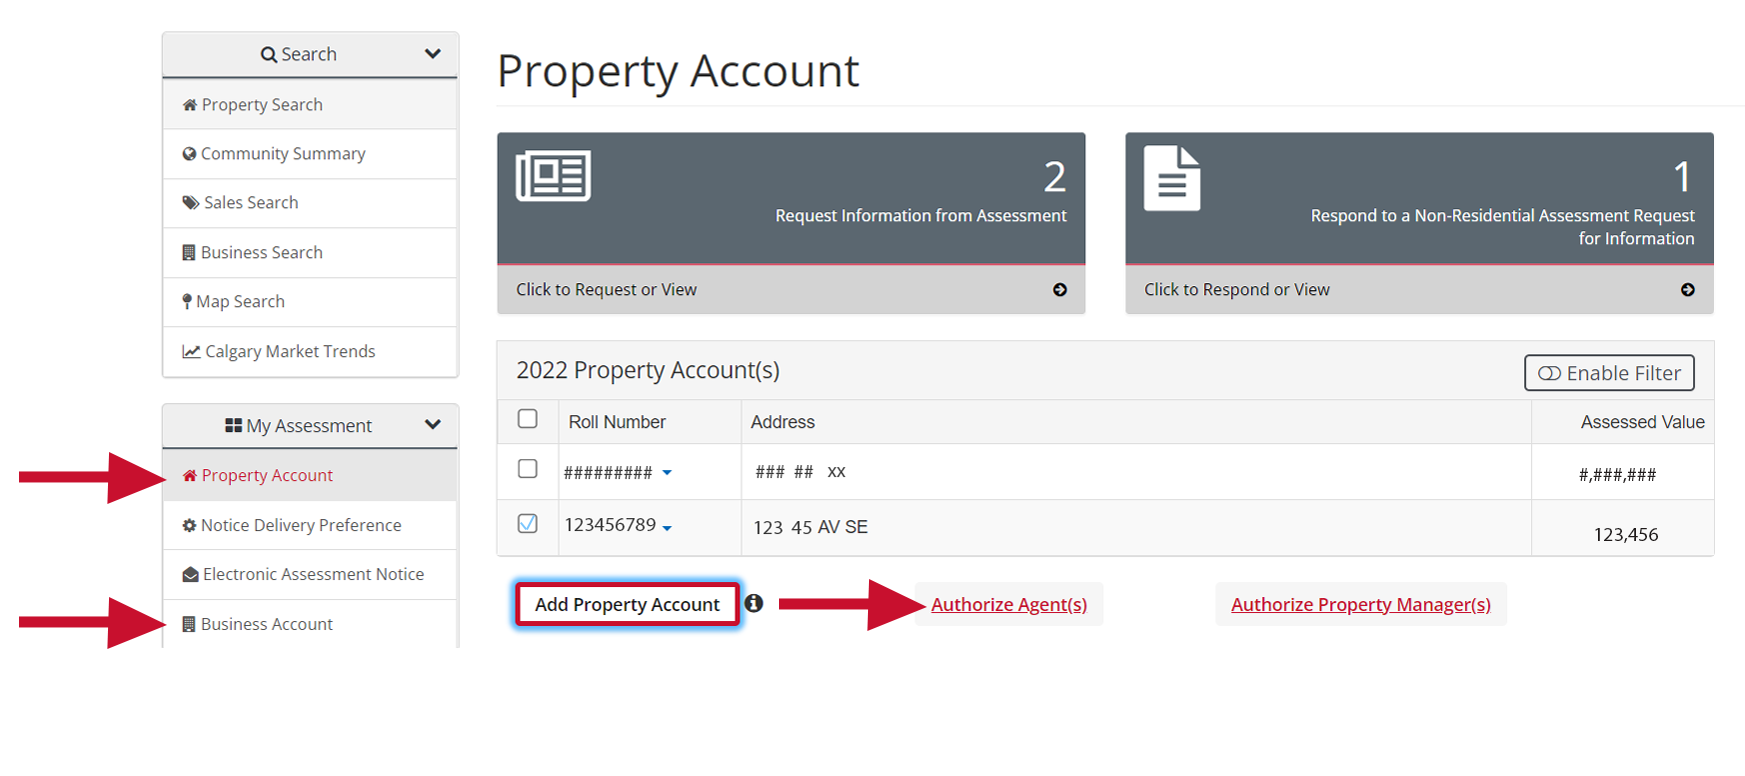
Select your property:
- Go to the Property Account page.
- Check the boxes next to the properties you want the agent to represent.

Step 3
Add or remove an agent
Step 3
Add or remove an agent
To authorize the agent:
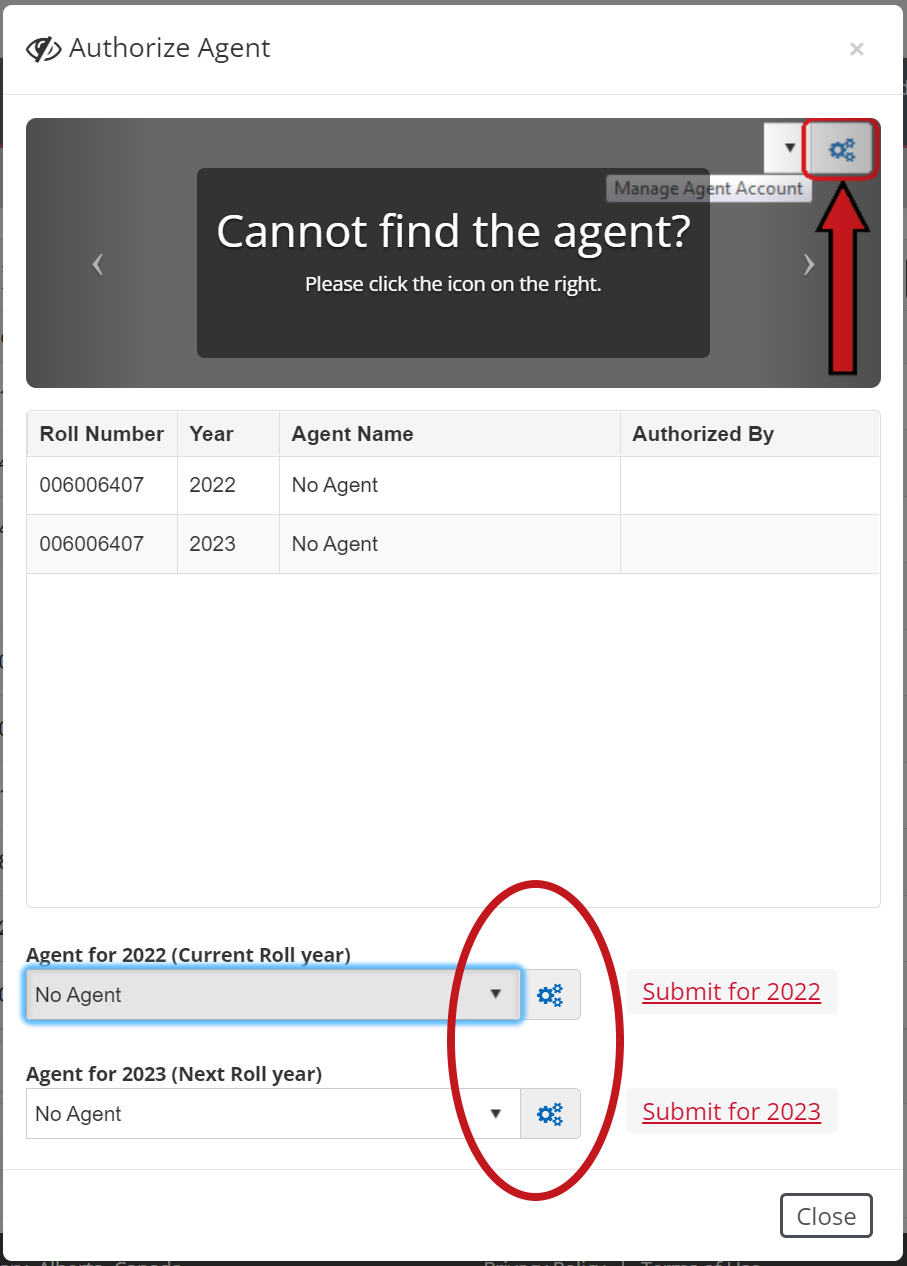
- Click Authorize Agent(s). A pop-up box will appear.
- If the agent already exists:
- Choose from the drop-down menu and click Submit for 20XX. Repeat this step for each roll year you want to authorize the agent for.
- If the agent is new:
- Click Add Agent, enter their ID, and click Submit.
- Return to the authorization step, select the new agent, and click Submit for 20XX. Repeat this step for each roll year you want to authorize the agent for.
- If the agent already exists:
To remove the agent's authorization:
- Click Authorize Agent(s). A popup box will appear.
- Choose No Agent from the drop-down menu and click Submit for 20XX. Repeat this step for each year you want to remove the agent’s authorization.

Step 4
Confirm
Step 4
Confirm
Confirm Authorization:
- Review the details and click Acknowledge and Certify.
- You’ll receive a confirmation message.


